Alternative clients for VPN access
Warning: for these alternative clients, no support can be provided by “Divisione ISI”.
Linux with Network Manager (like Ubuntu, Debian)
AnyConnect compatible connection method
NOTE: instructions were made on an Italian language system, images and English translations could be not accurate. Feel free to write us corrections.
These instructions are verified on a Ubuntu 10.10 installation.
As an alternative to the official Cisco client, the package openconnect can be used and integrated in the Network Manager with the package network-manager-openconnect (install with the preferred package manager). Sometimes a logout/login or a reboot is required to enable correctly the component.
At this point in the connection manager window of the Network Manager (right click on the Network Manager icon in the menu bar → Manage connections…), in the VPN tab is possible to create the connection pressing “Add…” button.
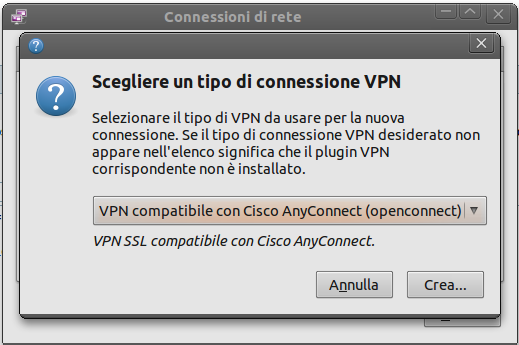
1) In the window that will appear, select the type “Cisco AnyConnect compatible VPN” and press “Create…”:
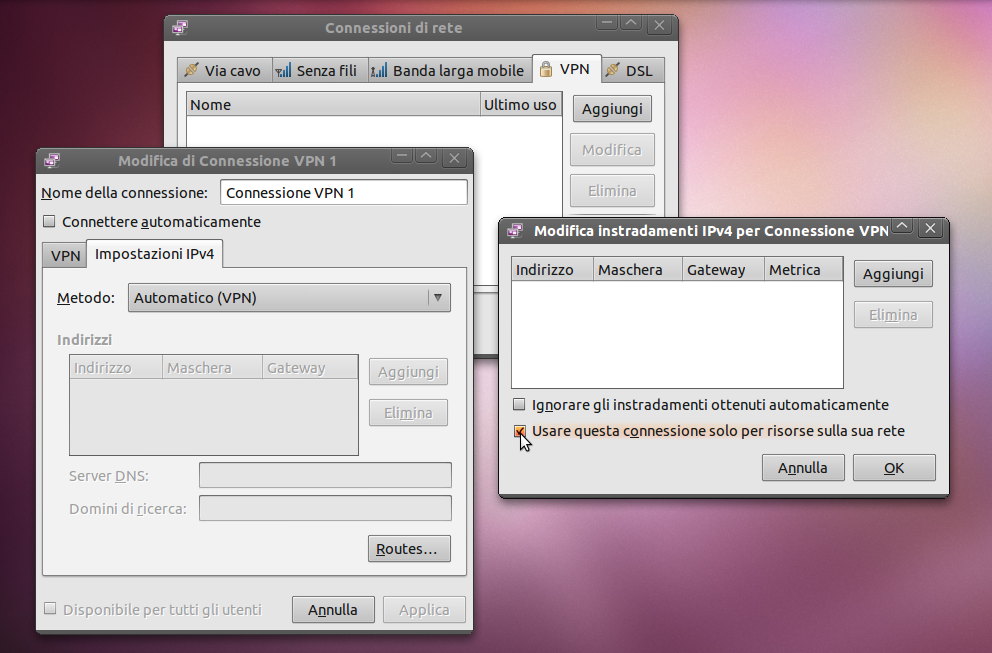
2) In the options, write caronte.units.it in the “Gateway” field, while on the “IPv4 settings” tab press the “Routes…” button and verify that the voice “Use this connection only for resources on its network” is checked:
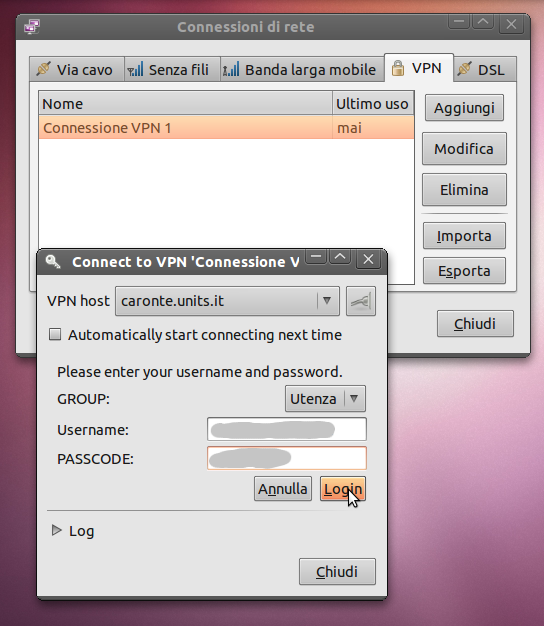
3) At this point, left click on the Network Manager icon on the menu bar, select “VPN connections” and then the newly created connection; the login window will appear, press the button next to the “VPN Host” caronte.units.it field to start the first connection:
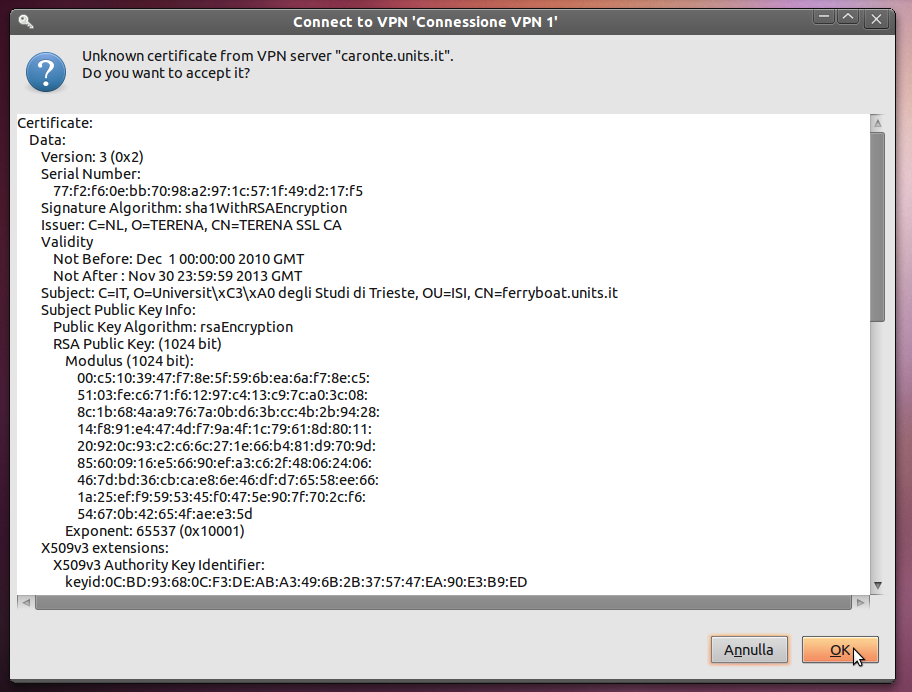
4) Now you will be asked to accept server's certificate (this will happen only on the first connection!):
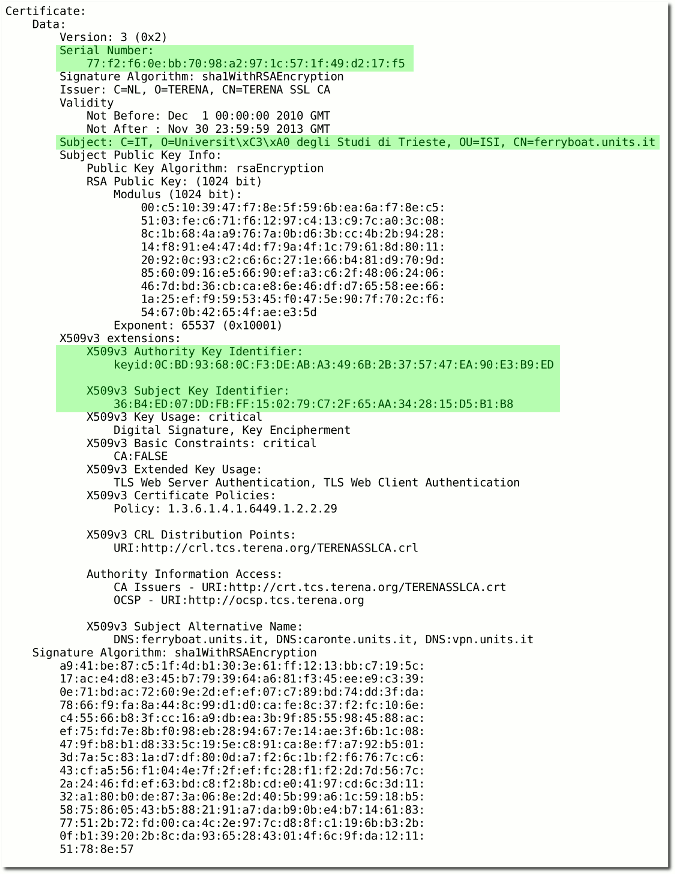
5) Verify that it is the correct one, verifying at least the green fields:

If the certificate does not correspond, it is possible that someone is trying to intercept the connection: stop this procedure and please contact the network administrators to point out the problem.
6) Now the client tries to connect without letting you specify the username and password, so the connection will fail:
7) Start the connection again as done at point 3), this time your credentials will be asked for: write them complete with domain informations and do the login.
8) At this point the VPN connection should be working correctly: the activation will be confirmed by the appearance of a small padlock next to the Network Manager icon on the menu bar:
Have a good work!

